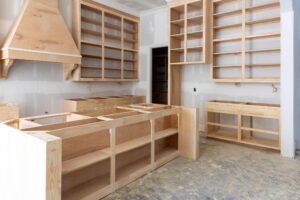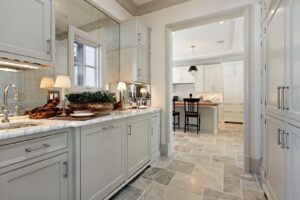
Making your home look “finished” is a work in progress. One way to add a final touch is to install crown molding on your kitchen cabinets.
Even on basic cabinetry, adding molding helps create a more custom, fine carpentry look. This project is a great one for beginners with little to no experience with carpentry work. Wooden nailing strips are added to the top of the cabinet, and the crown molding is fixed to that instead of directly to the cabinets, making for a forgiving project.
What you will need
Table of Contents
ToggleTools and Equipment
- A sturdy ladder – don’t stand on your countertops! Using a ladder properly prevents accidents.
- Tape measure
- Speed square
- Nail gun
- Miter saw
- Painter’s tape
- Two-inch angled paintbrush
- Fine-grit sandpaper
Materials
- One-by-two lumber
- Crown molding
- Wood putty
- Primer
- Interior paint
Instructions
1.Measure for the wooden nailing strips. Using the measuring tape, find the width and depth of the wall cabinets, and total the number. For example, if your cabinet is 36 inches wide across the front (a standard size), and the depth is 12 inches, you would add 36 to 12 and 12 (since the molding will wrap around both sides), for a total of 60 inches.
2.Measure crown molding. The bottom edge of the crown molding should be flush with the top of the cabinets. To achieve this, the nailing strips need to be stepped back slightly from the edge of the cabinets to allow for the thickness of the crown molding. A common thickness is ⅛”, but measure yours to be sure.
3.Cut nailing strips. Using the measurements you just took, cut the one-by-two lumber to the lengths of the cabinet edges, minus the crown molding difference. Remember to account for both sides, so if the measurement was ⅛”, you’ll need to subtract ¼” for both sides. For the 36” wide cabinet, the front piece would then be 35 ¾”. The side pieces would be the 12” depth minus the 1 ½” actual width of the front piece, minus the ⅛” set back from the front piece, and leaving a ⅛” expansion gap between the wall and the strip. These measurements put the side pieces at 10 ¾” long.
4.Install nailing strips. You can use the actual crown molding as a guide to make sure the strips are set back the right amount to create a flush front. Use a nail gun to secure the strip to the top of the cabinet with finishing nails.
5.Cut the crown molding. Using the miter saw, cut the front piece of the crown molding, making sure to cut a 45-degree angle on each side. Remember that the back edge of the molding will be 36”, but the front sides will flare out to meet up with the two side sections. Cut the two side pieces with one side complementing the 45-degree angle of the front piece and the second edge at a 90-degree angle.
6.Install crown molding. Use the nail gun to attach the molding to the nailing strip in the front of the cabinet, then match the two side pieces and secure them with finishing nails. It helps to have another set of hands to hold the molding at a precise 45-degree angle while securing the corners.
7.Prime and paint. Use the painter’s tape to protect the cabinets from paint. Fill nail holes with wood putty and sand flush to create a seamless finish. Apply two coats of primer (unless your crown molding is already primed), then paint with interior paint. You’re done!
Contact Mountain States Kitchen and Bath
You can install a crown molding to create a more custom look for your cabinets, or you can go ahead and install custom cabinets. Locally-owned Mountain States Kitchen & Bath serves all of Utah County and has all the custom cabinetry options you need for your Utah home. From soft-close drawers to all-wood construction, we can help you design the beautiful kitchen cabinets you’re after. Contact us for a free quote today!