Can you really take on a cabinet painting project yourself?
Absolutely, you can definitely tackle a DIY cabinet painting project. It might seem daunting, but with careful planning and attention to detail, you can achieve great results. Here’s a step-by-step guide to help you through the process:
Step 1: Gather Supplies
Before you begin, ensure you have all the necessary supplies. This includes the following:
- Paint
- Primer
- Sandpaper of various grits (120, 220, and 320)
- Drop cloths
- Painter’s tape
- High-quality paintbrushes (angled and straight)
- Microfiber rollers
- Paint trays
- A screwdriver set
- Cleaning supplies (degreaser, mild soap, and water)
- Wood filler
- A putty knife
- Safety gear (gloves, safety goggles, and a mask)
- A plastic sheet to lay doors on during painting
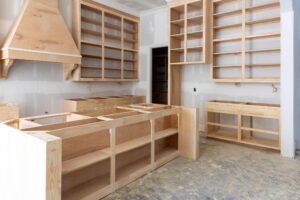
Step 2: Clear the Area
Remove all items from the cabinets and the surrounding area. This includes dishes, utensils, and any other objects. Cover countertops, appliances, and the floor with drop cloths to protect them from paint splatters, dust, and debris.
Step 3: Remove Hardware
Using a screwdriver set, carefully remove cabinet doors, drawers, and all hardware like knobs, handles, and hinges. Place all hardware in labeled plastic bags to keep them organized and ensure easy reinstallation later.
Step 4: Clean and Prep
Start by cleaning all cabinet surfaces thoroughly. Use a mixture of water, mild soap, and degreaser to remove grease, grime, and dirt. Make sure to wipe down all surfaces and corners. Rinse with clean water and allow to dry completely.
Step 5: Fill and Repair
Inspect the cabinets for any dents, holes, scratches, or imperfections. Use a putty knife to apply wood filler to these areas, and then smooth it out to match the surrounding surface. Allow the filler to dry completely, then sand it until it’s flush with the cabinet surface.
Step 6: Prime the Surfaces
Apply a thin and even coat of primer to all cabinet surfaces using a high-quality brush or microfiber roller. Priming helps the paint adhere better and prevents wood tannins from bleeding through the paint. Allow the primer to dry as per the manufacturer’s instructions.
Step 7: Sand Again
Once the primer is fully dry, lightly sand the surfaces with 220-grit sandpaper. This step helps to create a smoother surface and ensures the paint adheres well. Sanding also helps to eliminate any brushstrokes or imperfections left from the priming process. Wipe away dust with a tack cloth or a damp microfiber cloth.
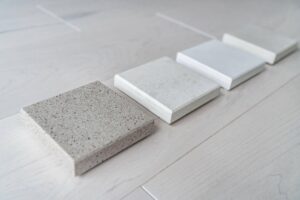
Step 8: Choose the Paint
Select a paint specifically formulated for cabinets. Opt for a satin or semi-gloss finish paint, as they are more durable and easier to clean. Consider the color and style you want to achieve in your kitchen.
Step 9: Paint the Cabinets
Start painting the cabinet frames with an angled brush. Begin with the inner edges and corners, then move to the larger flat areas. Use long, smooth brush strokes toward the wood grain to minimize brush marks. Work in small sections to maintain a wet edge and ensure even coverage.
Step 10: Paint the Doors and Drawers
Lay the cabinet doors and drawers flat on a clean plastic sheet. Using a microfiber roller or a brush, apply the paint evenly. Start with the inner panels, moldings, and edges, then move to the larger flat surfaces. Avoid heavy coats that can lead to drips. Allow each side to dry completely before flipping them over to paint the other side.
Step 11: Apply Additional Coats
For a professional finish, apply 2-3 thin coats of paint, allowing each coat to dry thoroughly before proceeding. Sand lightly with 320-grit sandpaper between coats to remove any dust particles that may have settled on the surface. Wipe away dust with a tack cloth before applying the next coat.
Step 12: Let Everything Dry
After the final coat of paint, allow all surfaces to dry and cure according to the paint manufacturer’s instructions. This typically takes a few days. Avoid handling or reattaching hardware until the paint is fully cured.
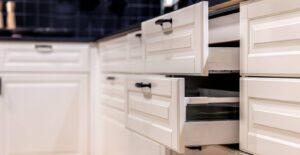
Step 13: Reattach Hardware
Once the paint is completely dry and cured, reattach the cabinet hardware using the labeled pieces. Ensure all knobs, handles, and hinges are appropriately aligned and tightened.
Step 14: Reinstall Doors and Drawers
Carefully reinstall the cabinet doors and drawers. Check for proper alignment, and use a level if necessary to ensure they hang straight. Adjust hinges if needed for a perfect fit.
Step 15: Finishing Touches
Inspect all surfaces for imperfections, missed spots, or drips. Touch up these areas using a small brush. Make sure the paint lines are clean and even. This attention to detail will greatly enhance the final look.
Step 16: Clean Up
Clean your brushes, rollers, paint trays, and other tools thoroughly using the appropriate cleaning agents (usually water for latex paint). Properly dispose of paint cans, brushes, and other waste according to local regulations.
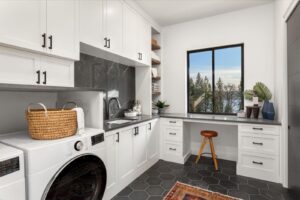
Step 17: Enjoy Your Work
Step back and admire your freshly painted cabinets. Take pride in the transformation you’ve achieved through your hard work and attention to detail.
Step 18: Maintain Your Cabinets
Clean your cabinets regularly with a damp microfiber cloth and a mild cleaner to keep your them looking great. Avoid using abrasive cleaners or scrubbing pads that could damage the paint finish.
Step 19: Consider Sealing
For added protection, you can apply a clear polyurethane sealer specifically designed for cabinets. This step enhances the durability of the paint finish and helps it withstand daily wear and tear.
Step 20: Share Your Success
Share your achievement with friends and family! Your DIY cabinet painting project can inspire others to undertake creative endeavors.
Remember, patience and attention to detail are key throughout the process. With these steps and dedication, you can achieve a professional-looking finish for your cabinet painting project.
If this guide has given you the confidence to tackle your DIY cabinet painting project, great! However, if this seems daunting, consider hiring a professional.
And Here’s Why
Hiring a professional to paint your cabinets can offer several advantages contributing to a high-quality and hassle-free outcome. Here are the reasons why you might consider bringing in a professional for your cabinet painting project, along with detailed explanations for each:
Expertise and Experience
Professional cabinet painters have extensive experience preparing surfaces, choosing the right products, and executing flawless paint applications. Their accumulated knowledge ensures that the entire process is carried out skillfully, from surface preparation to the final coat.
Quality Results
Professionals are well-versed in the techniques required to achieve a smooth, even finish. Their expertise helps minimize brush marks, drips, and other imperfections that can often arise when inexperienced individuals attempt cabinet painting.
Time and Efficiency
Professional painters are equipped to work efficiently. They follow streamlined processes to complete the job faster than a DIY project might take. This means less disruption in your home and a quicker return to fully functional cabinets.
Detailed Preparation
Preparation is a crucial step in cabinet painting. Professionals meticulously clean, sand, and prime surfaces to ensure optimal paint adhesion. Their attention to detail in this stage directly contributes to the paint job’s longevity.
Specialized Tools and Equipment
Professionals come equipped with specialized tools such as spray guns, high-quality brushes, and professional-grade rollers. These tools contribute to a superior finish and more even paint coverage.
Proper Product Selection
Choosing the right products can be overwhelming for a DIY painter. Professionals know the best paints, primers, and sealers for various cabinet materials. This ensures that your cabinets look great and withstand daily use and cleaning.
Customized Solutions
Experienced professionals can provide tailored advice based on your specific cabinets, style preferences, and existing decor. They can recommend color palettes, finishes, and techniques that align with your vision.
Minimal Disruption
Hiring professionals minimizes disruption to your daily routine. They work efficiently and can often complete the job in a shorter timeframe than a DIY project, allowing you to enjoy your updated cabinets sooner.
Potential Cost Savings
While hiring a professional does come with a cost, it can save you money in the long run. Their expertise reduces the likelihood of mistakes that might require costly corrections, and the high-quality finish can enhance the value of your home.
Warranty and Guarantees
Many professional painting companies offer warranties or guarantees for their work. This means that if any issues arise with the paint job within a certain timeframe, they will rectify the situation at no additional cost.
Health and Safety Considerations
Professionals know proper safety protocols, including protective gear and ventilation, when working with paints and chemicals. This ensures a safe environment for both the painters and the occupants of the home.
Customization and Detailing
Skilled professionals can execute intricate detailing and custom designs that might be challenging for a DIY painter. This level of customization can truly elevate the aesthetic of your cabinets.
Seamless Finish
Achieving a uniform finish, especially on large surfaces like cabinets, requires finesse and experience. Professional painters possess the skills to ensure an even coat and consistent color throughout.
Stress Reduction
Painting cabinets can be a labor-intensive and stressful project for homeowners without experience. Hiring professionals alleviates this stress, allowing you to focus on other priorities while the experts handle the painting process.
Enhanced Property Value
Professionally painted kitchen or bathroom cabinets can significantly enhance the value of your home. Potential buyers will likely be impressed by well-executed, quality work, making your property more appealing.
Hiring a professional for your cabinet painting project provides you with expertise, quality results, time savings, and personalized solutions. Their attention to detail, specialized tools, and commitment to delivering a flawless finish ensure that your cabinets receive the best possible treatment, ultimately enhancing the aesthetics and functionality of your living space.
Mountain States Kitchen and Bath
We specialize in all things cabinets across the Wasatch Front, from Spanish Fork to Salt Lake City, Utah, and everywhere in between. Contact us online today or at 801-326-0044 to learn more about what we offer, or swing by our showroom in Lehi, Utah, and see some of our beautiful options and designs for yourself.
We’ll happily answer any questions or schedule an in-home consultation with you. Let us help you design the home of your dreams. We can’t wait to work with you!